

Hey there! As a safety clamp supplier, I've seen my fair share of situations where safety clamps fail. It's not a fun thing to deal with, but it's important to know what to do when it happens. In this blog, I'll walk you through the emergency response steps if a safety clamp fails.
First off, let's understand why safety clamps are so crucial. Safety clamps are used in a variety of industries, from oil and gas to manufacturing. They're designed to hold things in place, prevent leaks, and ensure the safety of equipment and personnel. When a safety clamp fails, it can lead to all sorts of problems, like fluid leaks, equipment damage, and even safety hazards.
So, what should you do if you find yourself in a situation where a safety clamp has failed?
Step 1: Assess the Situation
The moment you notice that a safety clamp has failed, the first thing to do is to quickly assess the situation. Look around and see what's going on. Is there any fluid leaking? Is the equipment still stable? Are there any signs of immediate danger to people or the environment?
For example, if you're in an oil and gas setting and a safety clamp on a pipeline fails, you need to check if there's an oil spill. If there is, it could pose a fire hazard or environmental risk. On the other hand, if it's a clamp on a small manufacturing machine, the risk might be more about equipment damage and downtime.
Step 2: Isolate the Area
Once you've assessed the situation, it's time to isolate the area. This means keeping unauthorized people away from the scene. Put up warning signs or barriers if possible. If there's a risk of explosion or fire, make sure to turn off any nearby electrical equipment or sources of ignition.
Let's say you're working in a chemical plant and a safety clamp on a chemical storage tank fails. You need to cordon off the area to prevent anyone from accidentally coming into contact with the spilled chemicals. This will help minimize the risk of injuries and further damage.
Step 3: Stop the Source of the Problem
If it's possible to stop the source of the problem, do it right away. For instance, if the safety clamp failure has caused a fluid leak, try to shut off the valve or stop the flow of the fluid. This can prevent further damage and reduce the risk of a larger incident.
In a water treatment plant, if a safety clamp on a water pipe fails and there's a leak, you can quickly turn off the water supply valve upstream. This will stop the water from flowing and allow you to focus on fixing the clamp.
Step 4: Evaluate the Damage
After you've isolated the area and stopped the source of the problem, it's time to evaluate the damage. Check the failed safety clamp itself. Is it broken beyond repair? Are there any signs of wear and tear that could have led to the failure?
Also, look at the equipment or system that the clamp was holding. Is there any damage to the pipes, tanks, or other components? This evaluation will help you determine the best course of action for repair or replacement.
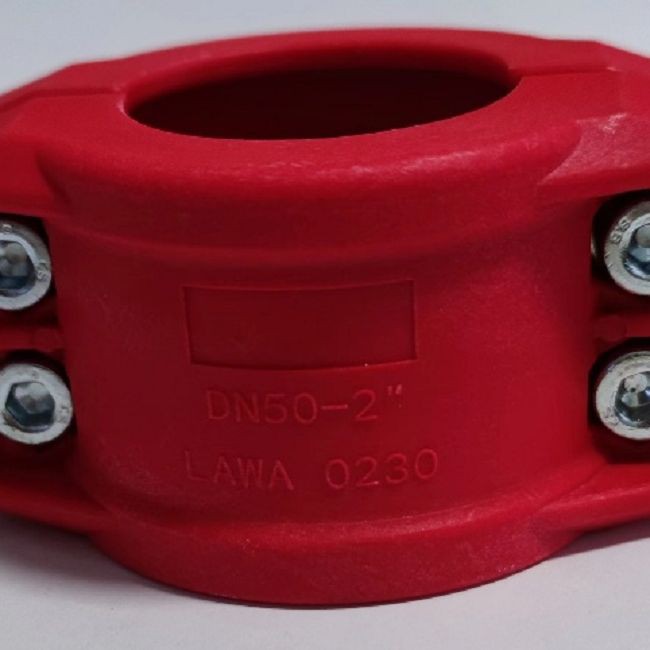

Step 5: Decide on Repair or Replacement
Based on your evaluation of the damage, you need to decide whether to repair or replace the safety clamp. Sometimes, a minor issue like a loose screw or a small crack can be fixed with a simple repair. However, if the clamp is severely damaged, it's usually better to replace it.
As a safety clamp supplier, I can tell you that using high - quality clamps is essential. We offer a range of safety clamps, including the SS316 Safety Clamp, which is made of stainless steel and is highly resistant to corrosion. The PP Safety Clamp is made of polypropylene and is great for applications where chemical resistance is needed. And the Aluminum Safety Clamp is lightweight and strong, suitable for many general - purpose applications.
Step 6: Implement the Repair or Replacement
Once you've made the decision, it's time to implement the repair or replacement. If you're repairing the clamp, follow the manufacturer's instructions carefully. Make sure to use the right tools and parts.
If you're replacing the clamp, choose the right type and size for your application. Install the new clamp properly, following all the installation guidelines. This will ensure that the clamp works effectively and safely.
Step 7: Test the System
After the repair or replacement is done, it's crucial to test the system. Check if the new or repaired safety clamp is holding properly. Make sure there are no more leaks or signs of instability.
For example, if it's a pipeline system, slowly turn on the flow of fluid and monitor the area around the clamp for any signs of problems. If everything looks good, you can gradually increase the flow to normal operating levels.
Step 8: Document the Incident
Finally, don't forget to document the incident. Write down what happened, when it happened, and how you responded. This documentation can be useful for future reference, especially if there are any insurance claims or regulatory requirements.
It can also help you identify patterns or issues that could lead to similar clamp failures in the future. By analyzing the incident, you can take steps to prevent similar problems from occurring again.
In conclusion, dealing with a safety clamp failure requires a quick and organized response. By following these steps, you can minimize the damage, ensure the safety of your personnel and equipment, and get your operations back up and running as soon as possible.
If you're in the market for high - quality safety clamps or need more information about our products, don't hesitate to reach out. We're here to help you find the right solutions for your safety needs. Let's work together to keep your operations safe and efficient.
References:
- Industry standards for safety clamp design and use
- Manufacturer's manuals for safety clamps