

Hey there! As a supplier of hose menders, I get this question a lot: "Do I need any special tools to use a hose mender?" It's a valid query, especially if you're new to fixing hoses or just not too handy with tools. So, let's dive into this topic and find out what you really need.
First off, let's understand what a hose mender is. A hose mender is a device used to repair a damaged hose. It connects the two broken ends of the hose, allowing it to function again. There are different types of hose menders available in the market, like the Plated Steel Hose Mender, the Brass Hose Mender, and the Hose Mender Saving Connectors. Each type has its own features and benefits, but for the most part, they serve the same purpose.

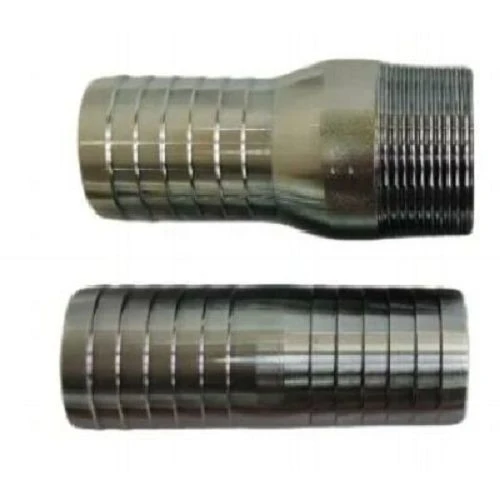
Now, back to the question of special tools. In many cases, you don't necessarily need any special tools to use a hose mender. Basic hand tools are often sufficient for the job. Here's a look at the common tools you might need:
Simple Hand Tools
1. Scissors or a Utility Knife
These are used to cut the damaged part of the hose cleanly. If the hose is frayed or has a large tear, you'll want to cut it back to a clean, straight edge. This ensures a proper fit with the hose mender. Just make sure to choose a sharp pair of scissors or a good-quality utility knife to get a smooth cut.
2. Adjustable Wrench
Some hose menders require you to tighten nuts or bolts. An adjustable wrench comes in handy for this task. It can be adjusted to fit different sizes of nuts and bolts, making it a versatile tool to have. You usually don't need a very large or powerful wrench, but one that can provide enough torque to secure the mender tightly.
3. Pliers
Pliers can be useful for holding the hose mender in place while you're making the connection. They can also help you grip small parts and make any last - minute adjustments. For example, if there's a small clip or a tab on the mender that needs to be bent or adjusted, pliers can do the trick.
Using a Crimpless Hose Mender
A lot of our customers prefer crimpless hose menders. These are really easy to use and don't require any special crimping tools. With a crimpless hose mender, you simply insert the hose onto the mender. There are often ridges or grooves on the mender that grip the hose tightly. Sometimes, you might need to use a bit of force to push the hose onto the mender, but that's usually all there is to it.
When Special Tools Might Be Necessary
There are some situations where you might need special tools. For instance, if you're using a Plated Steel Hose Mender that requires crimping, you'll need a crimping tool. Crimping is a process where you use a special tool to compress a fitting around the hose. This creates a tight, leak - proof seal.
The type of crimping tool you need depends on the size and type of the hose mender. There are manual crimping tools that are relatively inexpensive and easy to use. These are great for small - scale repairs or for DIY enthusiasts. On the other hand, if you're dealing with larger hoses or professional - grade installations, you might need a hydraulic or pneumatic crimping tool. These tools can provide a more consistent and powerful crimp, but they're also more expensive and require a bit more training to use safely.
Benefits of Not Needing Special Tools
One of the great things about many hose menders is that they're designed to be user - friendly. You don't need to be a professional plumber or a tool expert to use them. This means you can save time and money on repairs. You don't have to go out and buy expensive tools, and you can fix the hose yourself in no time.
For homeowners, this is a huge plus. You can quickly repair a garden hose or a small water hose without having to call in a professional. And for businesses, it means less downtime. If a hose breaks in a factory or a workshop, you can get it fixed right away without waiting for a repair person to arrive.
Tips for Using a Hose Mender
- Measure Twice, Cut Once: Before you cut the damaged part of the hose, make sure you measure the length accurately. You want to remove just enough of the damaged section to get a good fit with the hose mender.
- Clean the Hose Ends: Use a clean cloth to wipe the ends of the hose before inserting them into the mender. This helps to ensure a tight seal and prevents any debris from getting into the mender.
- Test the Connection: After you've installed the hose mender, turn on the water or the fluid flow (depending on what the hose is used for) and check for any leaks. If you see any leaks, you might need to tighten the mender or make some adjustments.
Conclusion
So, to answer the question "Do I need any special tools to use a hose mender?", in most cases, the answer is no. You can use basic hand tools like scissors, wrenches, and pliers to get the job done. However, if you're using a hose mender that requires crimping, you'll need a crimping tool.
If you're in the market for a high - quality hose mender, we've got you covered. We offer a wide range of hose menders, including Plated Steel Hose Mender, Brass Hose Mender, and Hose Mender Saving Connectors. Our products are designed to be reliable and easy to use.
If you have any questions about our hose menders or need help choosing the right one for your needs, don't hesitate to reach out. We're here to assist you with all your hose - mending requirements. Whether you're a homeowner looking to fix a small leak or a business in need of industrial - strength hose menders, we can provide the solutions you're looking for. Contact us today to start a discussion about your purchase.
References
- General knowledge about hose menders from industry experience
- Product specifications and usage guidelines from our inventory of hose menders